Thursday, October 24, 2013

Christmas Altered Spool Decoration featuring Tim Holtz Dies

It's beginning to look a lot like Christmas!   Time to start those Christmas projects if you haven't already.  Today I have a project that I am totally in love with.  It was inspired by a project I saw on Pinterest and it is another project I created to do with Nancy Williams at the CK Convention in Jacksonville.  Isn't it fabulous!    I didn't have a spool large enough for this project so I created one.
So out came a toilet paper roll for the center and 4 chipboard discs that I cut from my Martha Stewart Circle Cutter.  You can see it here in the above picture.  And I must exclaim about how beautiful I think the Tim Holtz Poinsettia Die and embossing folder combination flower is.  Wow, first time I used it and I got it last year.  I am in love-so pretty.
Here's another look at those juicy flowers!!!
And here again on the top of the spool  There are two medium and one large one in the back to fill in the space.  You can also see the "Noel" die and the 25 is in the center of a Marianne die.
This is the Tim Holtz Snowman die all guzzied  up in pink.  Ain't he darling!  Oh my, I am just in love with this creation.  I embossed him and then glittered him.
Here you can see I used the Tim Holtz Clock die and the Lamp Post. 
So thank you for stopping by today to see this pretty decoration I created.  I have included a video where I explain the process a little more and close ups.  Would love to hear what you think!  Have a great day and Happy Crafting!


Monday, October 21, 2013

CottageCutz Candle In the Window

Christmas is fast approaching.  Time to start thinking about Christmas Cards.  Today is a creation using CottageCutz dies.  I must admit I had to get creative with my dies to achieve this look.  But I do love how it turned out!
To create this card, I started with the Victorian Window Die which you see in the middle.  My idea was to put the Christmas Cheer Candles in the window-but they were slightly to big and not in proportion.  I realized I needed a bigger window.  So I created this window by using the Classic Arched Window.
The Classic Arched Window was die cut, then cut in half lengthwise, and the top arch was cut off as well.  The two pieces were attached to either side of the Victorian Window to get the size that I was looking for.  This is just an example how you can get creative with your dies!!!
To complete the festive effect of the card, I added some Recollection Poinsettia, a Bow, and a Martha Stewart Border Punch at the top of the card.  The Winter Pine Branch was used as the leaves under the Poinsettia.  This was so fun to make and I just love how it turned out.  Thanks for visiting today.  I sure do appreciate it.  Happy Crafting!
 

Saturday, October 19, 2013

CottageCut Halloween Matchbox Treat Holders

 Hey crafters!  I don't know about you, but at Halloween I just love to make all kinds of little candy holders to pass out to people on Halloween.  The bank teller, the postman, the cashier at the grocery store, my two favorite guys at Subway....yeah the list goes on.  Why not spread a little happiness and cheer, right!!!
 I love the little match box treat holders.  They are one of my favorite things to make.  So this year I am using the really cute CottageCutz Halloween release to decorate my boxes. 
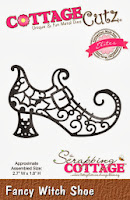
 This is the Fancy Witch Shoe and the Filigree Bat with the box open.  I have a package of M & M's inside this one.  I used a small Spellbinders Label Die for the base to build the top of the box.  Tied a ribbon, added a pretty flower, and some sequins for bling and it's done! 
 Here it is closed.  Isn't it sweet!
This one has just a pair of Filigree Bats and notice that little skeleton embellishment.  Got him at Michael's and he is just the right size for these boxes.  My sentiments, by the way, are from a package of K & Company die cuts from my stash.
The last one is made with the Gothic Keys , Rest in Peace Bat Tombstone and the Filigree Bat.  I cut and extra piece for the back of the Tombstone and applied black glitter to make this sparkly.  These were super fun to make!
Thanks for stopping by today to visit and view my creations. 
 I sure do appreciate it.  Happy Crafting!


Thursday, October 17, 2013

CottageCutz Witches Brew Lunch/Gift Bag

 It's that time of year!  What am I talking about?  Well, Halloween, of course.  Don't you love the bright colors of the season.  On this project for CottageCutz, the papers are just "screaming" color and fun "spooky" images.  Sure to "thrill" even the most "squeamish"  Trick or Treater!
 This is a decorated lunch bag with a little bow handle at the top.  Now I never had girls, but if I did, I would have used something like this for her to carry her lunch to school in on Halloween!!! lol  Better yet, I was thinking about how someday I might have a grandchild and this would be the perfect little gift bag to place some treats in to give as a gift.
 Isn't this a darling die?  It's called Potion Bottles and they were so fun to put together.  They are popped onto a panel that was created with a Martha Stewart Spider Punch around the Page.  This is actually a flap that comes over the top of the bag and has a Velcro closure.
This image is Midnight Witches Brew.  It was cut on black cardstock and black glitter is what is making it sparkle.  The little Tea Time Doily is the backdrop for that creepy spider.  And yes, I did scare myself with that spider!!!!  I don't care for spiders AT ALL.  I punched that baby out and was really intrigued by how it pops up at the legs-not so intrigued when it got tangled up with the paper and flew up when I moved.  I jumped a half mile then laughed at scaring myself with the darn thing.  We have spiders this big and bigger in the south.  I will be sure not to leave any punched ones hanging around!!!!lol
The flower was created with some black lace netting that was on hand and a recollection orange bling piece was added to the center.  The sentiment is a K&Company from my stash.  Quick and easy if you need a gift bag for someone special or want to surprise a loved one with a great lunch bag!  Thanks for visiting today.  I really appreciate it.  Here are the dies I used:


Wednesday, October 9, 2013

CottageCutz Winter Wounderland Bendi Fold

Greetings Happy Crafters!  Today is my day to share with you a creation made with the fabulous CottageCutz dies.  This card is called the Bendi fold and was created by my friend Bibiana.  You can see her absolutely fabulous creation here.  Thank you so much Bibiana for the inspiration.  I added something extra to the Bendi Fold--------I am going to call this card "The Tent Topper Bendi Fold"......lol
This card was so much fun to make.  I have been wanting to try it out for some time.  It is so much easier than it looks.  When I received these dies from CottageCutz, I just knew I would be doing this card with them.  I love these dies-they were perfect.
Here is my card opened up.   Everything you see here is CottageCutz dies except for the fence.  That is a Martha Stewart punch.  I used Diamond Stickle dry glitter on all the white dies.  They sparkle in real life beautifully.
Here is a list of the dies from the bottom up:  Winter Wonderland Deer (the deer were cut apart), Winter Wonderland Border (the house on the left was cut off to fit the card),  Snow Swept Border (the tree on the right side was trimmed) Winter Snowflake Wreath, and Santa & Reindeer Flying.  On the inside of the card-Winterland Village, Homemade Christmas Gift Set (the sentiment) and the Rabbit at the fence is from the Rustic Sign & Tree die.  The trees are also from the Rustic Sign & Tree Die.
Love, Love, Love this card style.  Don't you think it is perfect for these dies!  Thanks a bunch for stopping by today to view this Tent Topper Bendi Card!  Sure do appreciate it.  See you soon!

Here are the dies:
 

Monday, October 7, 2013

Halloween Crow Altered Laughing Cow Cheese Box/Candle Holder

Hello lovely crafters.  Here is a project (as promised) that Nancy and I did at the CKC in Jacksonville last month.  Isn't this cool.  I took inspiration from many of the decorated crows I have seen on Pinterest and took it up several notches.  I am into these crows this year.  There are 100's of them at the Dollar Store and I want every one of them....lol
What the decorations are sitting on is an alter Laughing Cow cheese box....yeah I know I have a lot of them don't I.  But hey this is not just any Laughing Cow cheesebox-this is the DOUBLE ONE!!!  lol  Yes this will open if you want to put something  like "candy" in it.  Or better yet, a healthy thing to do would make a little mini to fit inside!
These beautiful roses were created with a Marvey Punch, painted with glue and glittered with "Paprika" colored glitter.  Aren't they vivid.  I place some purple shiny balls in-between the flower and some green glitter leaves in my floral arrangement.  I used cheesecloth around the decorations for a spooky-eerie effect!
Here is a close up of the crows necklace and hat.
Here's how the back side looks.
This skeleton is so cool with the spider on top of his head.  Yeah, I am liking skeletons this year too.  I don't even watch any scary movies or shows but they appeal to me this year....lol  I just think they are fun.  Thanks for stopping by.  Below is a video of my project and a little peep at the inside of my home with all my Halloween decorations.   On weekends I have them lit for most of the day.  It's so pretty.  Happy Crafting.  See you soon!
 
Entering these challenges
All Crafts Challenge  -  Anything but a card
Created with Love Challenge  -  Any Holiday
Haunted Design House Macabre Monday -  Halloween Dimensional
Sparkle and Sprinkle - Anything goes with glitter
Stamp and Create  -  Halloween

Anything but a Card Challenge  -  Colors of the Season Black & Orange
The Corrosive Challenge  -  Cute and Creepy
The Squirrel and the Fox  -  Things with Wings
Crazy 4 Challenges  - Halloween
PunkyouGirl  - Halloween


Thursday, October 3, 2013

CKC Convention Nancy & I

 Have you ever had so much fun that you wished you could do it over and over again?  Here is my dear sweet friend Nancy who lives in Alabama.  This is us at the CKC Convention in Jacksonville Florida about a month ago.   I had the absolute pleasure of meeting Nancy in person along with her wonderful family.  Our dream came true to finally meet and craft together.  Gosh, I had the greatest time ever.  Let me tell you that Nancy is just as sweet in person as she is on her blog and at SCS and even more.  She's beautiful both inside and out.  It was like we've known each other all our lives-like I have never known life without Nancy in it.  We had so much fun crafting, talking, laughing, and visiting that I hoped it would never end.  It was so hard to bid farewell when it was over.   But, the good news is......we (my husband and I) are going to Alabama in February for a visit.....lol    The guys will hunt and we will "hunt" for scrapbooking stuff in the stores, and craft, and talk, and visit!!!   Yeah-I can't wait.
Here is the card we made at one of the classes we took.  We only did one class and a couple of make and takes.  But we did go to the crops for two nights and that was fun.  I'll be showing you in the next couple of days what we made at the crops.  You will love it.  Everyone at the crops did.  We even won a prize for what we were making.  It was such a blast that I wish we were doing it all over again this weekend.  Thanks for stopping by.  I really appreciate it.  See you soon and Happy Crafting.