Sunday, January 30, 2011

Fred She Said Valentine Chocolate Box


Greetings everyone. If you are looking for the Fred She Said Blog Hop, please go here. This weekend I finished up this Fred She Said Box of Chocolates Cards. I was going to try to make those new rolled roses that everyone is making with the scalloped punch....well guess what they didn't work out for me.

Well, I bet you think I used Prima flowers on this instead...they look like Prima flowers don't they. I must confess that I made these flowers. With a punch and some glue, a little dazzling diamonds and stickles and I was able to achieve this. Cool huh! Can someone tell me if dazzling diamonds glimmer mist just looks frosty and not glittery? I am wondering if I might be doing something wrong. I have not gotten any glimmer mist that I care for because I don't see glitter when I spray....just frost like glistening. Help! lol

I have made a couple sizes of these roses and they look good in any size. I will share a tutorial with you when I finish my Mother's altered Chocolate box I am making her. I have my things ready to go for doing the tutorial, but my videotographer was busy this weekend pulling an engine....yes, we all have our projects around here.

Thanks for stopping by today. I hope you got some inspiration to create some feminine and frilly valentines. My image can be found here at the Fred and She Said Store. I've got some more things to share this week, so be sure to stop by later in the week.

Challenges Entered
The CD Sunday Challenge - Love is in the Air
Creative Cowgirls Challenge - Love is in the Air
Paper Sundaes - Valentine
Crazy for Challenges - Vintage or Shabby Chic
A Gem of a Challenge - Ribbons and Lace
Just Us Girls - Make your own Flowers

Friday, January 28, 2011

Fred She Said Blog Hop Colored Pansies Set

Welcome to the FRED SHE SAID BLOG HOP! If you got here by way of Sonya, you are on the right track. If you just happen by my blog, please start at the beginning at Tracy Lynn-Fred She Said Blog. You are to collect a word along the way to be eligible for the prize. One random winner will receive a $25 CAD (Canadian Dollars) from FSS Store AND $25 GC for CropStop. We would love if you would leave a comment so we know you were here!!!


You are sure to be delighted by all the different styles from our Design Team Members. My card has been crafted with the Colored Pansies images that you can find here at the Fred She Said store.I love layering these beautiful flowers. You can see here that I have three layers. I did this my cutting out the full flower with the leaves, then I cut out just the flower and pop dotted it onto the bottom flower. I cut just the pink portion of the flower next and pop dotted on top of the second layer.


Here is a look at the inside of my card.


This is the card with the envelope I created. What a gorgeous image. I just love it.


My word for the blog hop is - YOUR

Make sure to gather your words from each blog and follow the directions at the end of this blog hop to be eligible for the prize and email Tracey with the phrase.

Your next stop is Michelle- just click HERE

Thanks for join us for the Fred She Said Blog Hop. Good Luck in winning the fabulous prizes!!!


Challenges Entered
Crafty Sentiments - My Favorite Things (Punches, Die Cuts, Lots of Layers, Glitter)
Digi Doodle Shop - Swirls
Moving Along with the Times - Spring
Paper Play Challenge - Layer it Up
The Rubber Cafe - Sparkle and Glitter
Some Odd Girl - Scallops Galore
Southern Girl Challenge - Dry Embossing

Sunday, January 23, 2011

Fred She Said Rosie Heart Easel Card

Here is a little something I cooked up in my craft room this weekend. As a matter of fact, I have a few things I will be showing over the next few days. I am loving "Easel" cards. I haven't made very many, but I think now I am hooked.

I made this extra piece that slips under the middle for adding a personal message or a picture. The envelope box is 4 X 4 that you see in the foreground that I created especially for this card. The rose is rather chunky so this would not fit in a 4 x 4 envelope, it had to be an envelope box.

At least this time I kept my template for my next little easel like this. I made one of these boxes for the Digital Delights Card here but I guess I didn't keep my directions. It is made with a 7-1/2" piece of card stock. I will share the directions with the next one I make. Thanks for stopping in. I hope you enjoyed your visit and will come back again soon.

Challenges Entered:

Allsorts Challenge - Male or Boy
Craft Your Days Away - Love
Really Reasonable Ribbon - Hearts and Ribbon
Raise the Bar - N E W (Nestie, Embellishment, White)
Paper Romance - Shaped Cards
Creative Craft World - Cute and Cuddly
Creative Belli Challenge - P is for "Puppy"
The Creative Cottage - Shaped Card
Fab 'n' Funky - Animal Magic

Saturday, January 15, 2011

Oh the Weather Outside is Frightful

Greetings to everyone. Thank you to all my new followers and welcome to my blog. It has been so much fun seeing all those Angels being made with my tutorial and template. I am happy to be back blogging and back in my craft room. I would like to share with you my first card for 2011. With temperatures here in the 20's when I supposedly live in a tropical climate.....I am thinking of Snowmen!!!

I loved the shading of the hat so much when coloring with my new Copics, I decided to go with it as the main color of my card. The brown gives the card a nice warm feeling. On the inside of the card, I created an ornament the can be easily untied and used on the Christmas tree, or as a beautiful tag to go on a gift to someone special. Here is the Recipe:
Inkadinkadoo Snowman Stamp
Martha Stewart Bird and Branch Punch Around the Page
Spellbinders Fleur Di Lis Die Cuts
Spellbinders Scalloped Oval Nestabilities
Spellbinders Oval Nestabilities
Cuttlebug Corner Die
Plastic Snowflake from the Dollar Tree
Vintage Photo Distress Ink
Pearls and Stickles

Challenges Entered
Christmas Card Challenges-Snowmen
The Stamp Man Challenge - Distressed
Stamp Something - Anything Goes-Use a Rubber Stamp
Do You Stack Up - Distress It
Stampin' B's - Use a Die Cut
ABC Christmas Challenge - A for Anything Christmas
Creative Belli - Snow
Fab'n' Funky - Warm and Toasty Colors
My Time to Craft - Chocolate
Stamp With Fun - Snow

Friday, December 31, 2010

Happy New Year

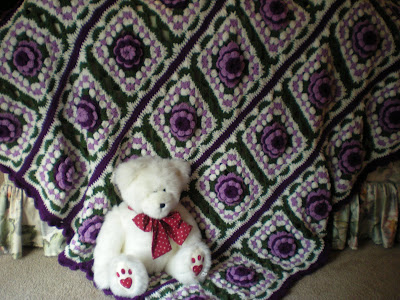
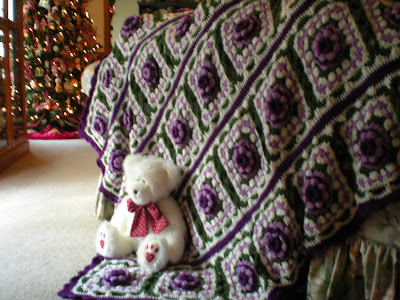
Happy New Year to everyone! I wish you all a happy healthy, and prosperous New Year. You probably have wondered where I went. Especially after the Angel tutorial I did. I can't believe it has been so long since I have posted. Anyway, I got sick one week after I started my new job and really struggled trying to get everything done to provide a Christmas for my family. I thought I would show you another one of the reason I haven't posted cards.....this is it! I made this afghan for a very special young lady for Christmas whose favorite color is purple.
You can see my Gingerbread tree here in the foreground of the picture. This took me a bit of time to complete. I am proud to say that I took this picture on Christmas Eve just before I wrapped this up-so I did get it done in time.

Wishing you Joy and Blessings in the New Year.
Bear Hugs,
Carol

Wednesday, December 8, 2010

Digital Delights - Little Dumpling in Pram

Greetings to all of you. Well I have an announcement to make. When you read this, I will be on my way to my very first day of work!!! After almost two years of being laid off, I finally found a job. I can hardly wait I am so excited. You just can't imagine how hard it was to find a job and how very thankful I am to have this one.

My card today is made with Little Dumpling in Pram and this image is from Digital Delights and you can find it right here. I paper pieced my pram and layered this image three times for dimension. Here is the recipe:

Martha Stewart Edger Doily Border
Martha Stewart Deep Edger Doily Lace Trim
Blue Flower Rhinestones on Wheels
Prima Flowers
Sizzx Flourish Die Cut
Spellbinders Lrg Oval Scalloped and Lrg Oval Die Cuts

Just a little reminder that Wendy is having a sale on Christmas Images so there is still time to get some of these cute images in time for your Christmas crafting needs.

Thanks so much for stopping by today. I am hoping to get up another video this weekend with another ornament tutorial and directions for you. It should be fun. I am loving all the Angels I am seeing in blogland made with my template.

Thursday, December 2, 2010

New Year's Card with Wine Topper

You just got a last minute invitation to a New Year's Eve Party. Oh my gosh, what do you do. You need a hostess gift and your need one fast. Well, here it is!!! Right at your fingertips and you will be ready to go to the party and impress your hostess with this very cute gift combo.

This is from the new release of New Beginnings called Little Dumplings New Years Girl. You can find her right here. She's perfect for your New Year's paper crafting needs.

For this creation, I used the Cuttlebug Clockworks embossing folder and the Spellbinders Timeless Heritage die for the clock. The champange glasses are a Martha Stewart punch called Flute with Bubbles.Here is a close up of the Wine Bottle Topper. This is so easy to do. Here are the directions:


WINE BOTTLE TOPPER


Cut a piece of cardstock 3-1/2 by 10-3/4
Score at 8"
In the middle of the 2-3/4 " side punch or die cut a 1-1/2 hole for the neck of the bottle.
Cut your designer paper 7-3/4 by 3-1/4
Cut another coordinating Designer paper 7-1/2 by 3
You can use a corner punch to fancy up the edges.
Layer one on top of the other and decorate as desire.


Here are the new releases


Thank you so much for stopping by today. Be sure to stop by the fabulous Design Teams blogs to see how they created some fabulous projects with these images.

Challenges Entered:
Mojo Monday - Sketch
A Crafty Little Place - Anything Goes
Tuesday Throwdown - Embellish It
Gingerloft - Bows
Paper Cutz - Anything Goes
I Did It Creations - Surprise Me
Paper Cupcakes - Anything Goes
Woodware USA - Anything Goes
Top Tip Tuesday - Anything Goes